

“I find “my” rock lying here and am very pleased to see it. Also, I can investigate the statue’s left nostril. That is kind of neat as I was primed to look hard at things’ nostrils when I needed to pull the snot from the tree’s nose. Whatever I try to do, my hand cannot fit inside the tiny hole. Maybe it’s time to pop another pill! But let’s save the game first, shall we?”
And this is how it worked out:
While that wasn’t necessary (I can’t enter the nostril and am kind of thankful for that) I find out that I can’t enter the statue’s mouth either. Its glowing eyes mesmerize me whenever I get too close. I quickly realise what I did wrong: I need to insert the unicorn key in the nostril. It is really obvious, to be honest. That shuts off the glowing eyes and I can finally enter the NiteMare. I’m treated to a short ending sequence and that’s that:


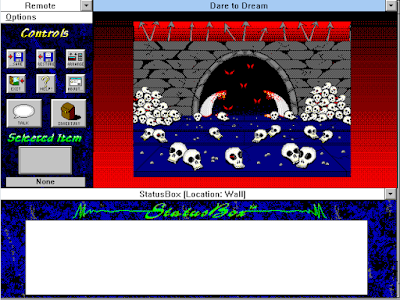 |
| The entrance to the NiteMare. |
For now, I only carry the dust with me, as well as my trusty unicorn key. The next screen is a cemetery that serves as a hub to most of the spooky locations of the NiteMare. I will try to describe every region one after the other which is more or less the way I played it because I first mapped the game very methodically. There are five cross-shaped tombstones in the cemetery and each one has an inscription that starts with “In the middle of the night…”, for example “there is crying...But no child.” I tried to make sense of it and they seem to relate to the different puzzles but I can’t really put my finger on it. Also, there are five exits from here (not counting the direction I just entered from) so maybe that’s that.
First I go left and head into the forest of agony. The trees have spooky faces, not weird ones like the trees in episode 2. Also, there’s a newspaper caught in one of the trees and I can’t seem to reach it. My unicorn key does the trick, though, but a sudden gust of wind blows it to another screen. I remember they did this with a piece of the map in Monkey Island 2 and I rather enjoyed this type of scavenger hunt. Here it works quite well, too. I can talk to the main tree who’s not unfriendly and when I talk to him a second time he reveals to me that Christian stuck a dagger in him which feels rather uncomfortable. I gladly relieve him of his pain and pocket the dagger that reeks of dark magic.
South of the forest of agony, there’s the river of sorrow. A desperate boy is floating in the river, unable to free himself. When I talk to him he asks me to cut him loose but at this point I’m unable to reach him or do anything else here. It’s a river of tears and I think I’ll have to pick up some of its water somehow at some point.
Northwest of the forest there’s a bunker. Through pixel-hunting I find an almost invisible bucket and pick it up. Inside the bunker, there’s a hole in the floor that leads to the basement. Tyler is unwilling to jump down, however, since it may be quite a long fall. There are two more hotspots there – a hot wall and some displaced stones – but I can’t interact with either of them.
Moving northwest again from the bunker I find a stone wall. A dragon’s remains lie scattered on the ground and there’s a small gravestone. Also, there’s a wooden sign above the gravestone telling me that these are the remains of Christian’s favourite pet. I’m a bit surprised that I can pick up the slab and carry it around with me in my inventory. That is a rather unusual item for an adventure game. I search inside the skull but it’s too dark to see. The description makes me suspicious: There’s nothing inside the skull right now! I make a mental note of it and decide to come back later.
I return to the forest of agony and another exit to the southwest leads me to an ominous circle of stones. I find nothing to do here but some pixel-hunting reveals that there is a bungee cord hanging in one of the trees. This must be for the hole inside the bunker but I’ve got nothing I could tie it to; the displaced stones don’t work.
The final exit from the forest leads me to a path and this is where the newspaper has found a new home in another tree. I use the key again and it is blown away to yet another screen. Also, I find a shovel lying in the grass. This will probably come in handy in these sinister surroundings. I follow the path up to a summit where there’s a roaring blue flame without any cause or explanation. I can’t interact with it or examine it any further, so I return to the cemetery to do some more exploring.
The second path from the cemetery leads me to a small tree with only one leaf left. “It looks like a bit of good has trickled into this evil place”, so this must be a talisman of some kind, I guess. The tree is close to the shore of something, and there are ships in the distance. Also, there is some activity far away which is actually a hotspot. When I click on it, Tyler shouts “HELLO” across the mountain but nobody replies. I try to cut the leaf off with my dagger but the (evil) dagger turns very hot when I approach it. The whole scene looks (and feels) like something out of Loom.
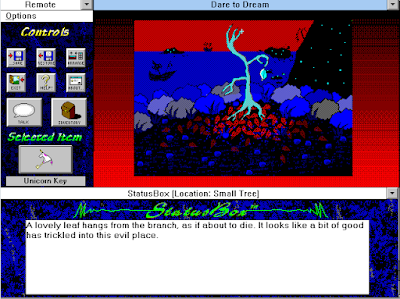 |
| Will the falling leaf teach me a melody? |
The fourth path leads me to a spooky schoolhouse. Inside, there are two skeletons hanging above some strange green campfire. Another one is lying close by. Some intense pixel-hunting lets me turn up a rock that’s lighter than I’d expect judging by its size. Could it be floating in water?
The fifth and final path from the cemetery leads me into a very simple maze made up of four locations. I find the newspaper in one of them and Tyler really seems to hate newspapers as it makes the blood coarse through his veins so much faster. It reminds him of his paper route. I map out the maze (which takes me all of two minutes) and navigate it to reach the one room of any interest, a crash site with a badly mangled jeep and another skeleton sprawled across the floor. When I talk to it, it turns out to be “the Unknown Soldier”. All he asks for is a proper burial, so I’d better put that shovel to good use.
 |
| He’s five foot-two and he’s six feet-four...no, that was the Universal Soldier. |
I start by filling the bucket with water from the River of Sorrow. Then I try dropping the rock in the river and it actually floats (yes, I half-expected that). I can now reach the boy and cut the rope that is holding him in place. Tyler feels a tremendous sense of relief but once again there’s no reward. Maybe this is what the five tombstones are about? Will they open or something when I have helped five poor souls find their way to the great beyond?
I decide to return to the dragon skull next in order to search it once again – maybe the game works with triggers. And what do you know: I find a shard of wood inside that turns out to be a stake! The clue was definitely there and although I don’t like these kinds of hidden timers too much, that fact made this puzzle quite okay. I know where I might need to use this, so I go straight to the bunker...and it works. I can thrust the stake into the earth and tie the bungee cord to it, allowing for access to the basement.
Down there I find a spider web but the status box tells me that I’ve got no use for a web...now. Is this another of those triggers? To the east there is a serpentine skeleton. I can talk to him and he tells me his name is Enthius and he’s starving down here. I don’t have anything to feed him but try out all of my items regardless. Nothing works, I must be missing an item.
Next, I try burning the newspaper, first in the blue, then in the green flame, and the latter one works, leaving behind some ashes I can pick up. I now have both ashes and dust in my inventory but don’t have a clue what that means. Burning the newspaper seemed kind of obvious because Tyler feels so strongly about it. So far I haven’t run into any problems.
But now I get stuck for quite some time. I systematically try to make sense of all of the hotspots that weren’t of any use so far and then some. Thus I find out that the blue flame is apparently an ice-cold one and I can use it to freeze the tears from the River of Sorrow. I don’t find a use for the frozen tears, though.
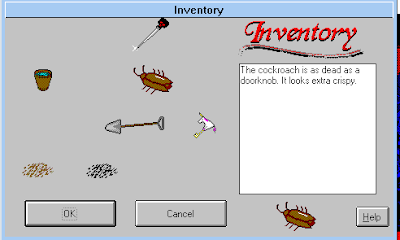
This episode seemed rather easy for quite some time but once the chain of puzzles is broken, I’m quite lost. I decided to call it quits for a while. When I continued to play the game a few days later I had two breakthrough moments. Firstly, I rummaged through the skulls on the first screen once more and found a dead cockroach among them. This should be food! Also, looking at my inventory it seemed odd that the ashes and the dust were lined up so neatly next to one another and almost looked the same.
 |
| It’s a clue! |
It’s another success. Either I’ve learned to think like Cliff Bleszinski by now or the third episode is easier than the other two. I don’t burn the picture but the flame is still helpful as a picture has started to fade in now. After a few more moves it is still developing so there may be a timer involved.
I stumble around with nothing left to do for more time than I’d like to admit before I remember that I didn’t even try to use the mirror anywhere. The most logical place is the skull cave and sure enough the mirror makes the mesmerising eyes vanish right away. I can hear a terrible wailing and have to say that it serves them right for staring at me like that.
I enter an enormous cavern and no amount of pixel-hunting turns up any hotspots there, so I head further north towards a bridge. The game briefly talked about my fear of bridges, so I think this whole mindscape might add up to even more had I paid more attention to all of the details. It’s quite probable that Dare to Dream has some replay value. The next door (and thus the bridge) is impassable for me because the heat of the lava below drives me back. Another obvious solution, right? I drop the bucket of ice in the lava and it cools it enough to get by. Sure, it’s adventure game logic but I like it.
The next room is horrible, so avert your eyes if you can’t handle gore particularly well. It’s called the chamber of pain and there’s an arm and a foot among a barely recognisable puddle of blood and organs. One room to the right it gets worse:
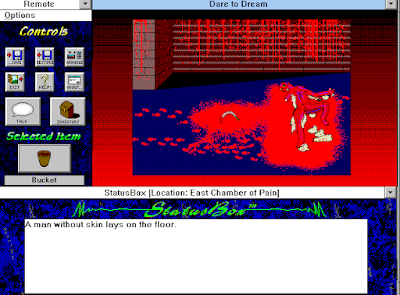 |
| Old skin for the new ceremony. |
Looking at my map I find that there’s one major item I haven’t been able to retrieve yet: the leaf. Also, when I examine the sickle in my inventory “it still seems to have a sense of good coming from it” despite the sinister purposes it was used for. That feels like a match to me and indeed I am able to cut the leaf down using the sickle. When I return to Solomon and touch him with the leaf he instantly crumbles into ashes. He thanks me and my semi-developed picture suddenly finishes developing! I can examine it again and… “You can now tell that this is a picture of your father. It looks exactly like he did right before he died. Every second you peer at this picture you feel like crying out.” Now I’ve learned somewhere along the way that my father died a few years ago. I’m still not sure what that means but as the showdown is nearing it’s probable that I will soon find out.
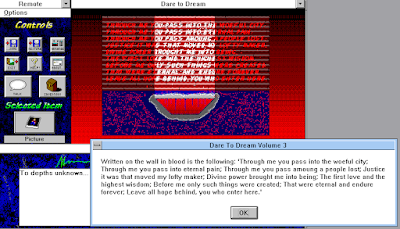
It will be a while before that, however, as I get stuck right before the end. The next room has some writing on the wall and a hole I can’t jump down, no matter how I try. I still must be missing something. The writing is the whole quote from Dante’s Inferno – you know, the one that was abridged to the last sentence in Zork. That doesn’t help me in my conundrum, though.
 |
| I’ve abandoned hope – will you give me a clue now? |
Without this method, I would never have figured it out, and as a boy or a young adult I would never have finished the game. The stubbornness of middle age has taught me to persevere, though, so I persevered. Randomly clicking the picture on the hotspot inside the circle of stones informs me that “You hold the picture of your father up to the glowing stones and a crystal appears!” That, my friends, is not a good puzzle. It can be solved, either randomly or through excessive mapping and note-taking but it doesn’t make a whole lot of sense. The crystal is icy cold and I can barely touch it, so it will probably help me pass through the heat barrier. And it works just fine. “You jump into the hole while holding the crystal out before you”, the game helpfully states.
That makes me suspicious. Before I tackle the endgame I restore and select a different item before jumping down, still with the crystal in my possession. It turns out that you need to have the crystal selected which is a first for the game. Sure, you use items that way but not on exits. The game suddenly relies on a different rule for its last puzzle.
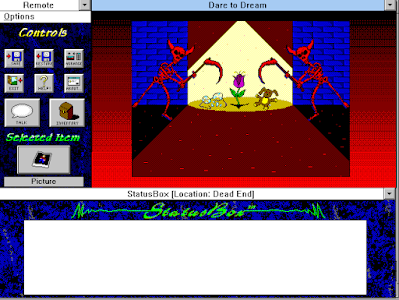
Yes, its last puzzle, the rest is really easy. A rat called Rennis who lives inside a skull with a candle on top wants proof that you really are Tyler because nobody else is allowed to pass. The picture of Christian does the trick and I find myself in the final location, the Dead End.
 |
| Is this a Duran Duran video? |


Session time: 2 hours, 40 minutes
Total time: 10 hours
Congrats on finishing the game!
ReplyDelete"The stubbornness of middle age has taught me to persevere"
I feel like I've not quite reached this point yet!
You glossed over it, but the path to the tree with the leaf requires a bit of pixel-hunting. The other exits at the cemetary are fairly self-explanatory, whereas that one is on the horizon for some reason.
ReplyDeleteI don't think anything's on a timer, the stake is just tied into completing some bit or another, probably the grave of the unknown soldier.
Also the skinned artist requires you have the partially filled in photograph to talk to him. Since you had it by that point I'm sure you didn't even notice.
What I would like to know is what batteries they put in that Jeep!
ReplyDeleteBut on a more serious note I appreciate that they worked harder on a deeper storyline, though I feel the "completely corrupt" and "completely pure" bit is too black and white. And kudos for encouraging emotional openness, a topic that tended to be avoided back in those days.