Thursday 28 November 2013

Game 38: Conquests of Camelot - Tis Nothing But a Flesh Wound!

King Arthur Journal Entry 3: "What an odd day I'm having! I've defeated a supernatural knight in a jousting tournament, broken a spell that had turned an attractive lady into a hag, solved a bunch of riddles that were given to me by stones, defeated a seriously insane monk in combat, and most recently, bribed a bunch of spirits that had entrapped me upon the hill of Glastonbury Tor! And what do I have to show for all this? Just this cold crystal heart that I found in a well! Here's hoping it's the item the Lady of the Lake so badly wanted."


Ready...fight!

How can one possibly defeat an invincible knight? That was the question I was asking myself as I faced off against the Black Knight in Conquests of Camelot. The infamous knight had given me the chance to walk away, but doing so would condemn my fellow knight Gawaine to certain death. To keep my honour intact, I had no choice but to agree to his jousting challenge. As I did so, my view shifted to one I’d not experienced in the game so far. To the left of the screen I could see an image of the Black Knight, while I could see myself to the right. In between these images I had a first person view of the jousting field. I quickly noted that I was able to move my shield by using the E,S,D and F keys, and that I could move my lance by using the 8, 4, 2, 6 and 5 keys. Suddenly the Black Knight charged at me, moving his lance to his right as he did. I pressed the S key to move my lance to my left, assuming this would block his attack, only to find myself on my ass a second later! “The Black Knight has unhorsed you for the first time, Arthur. Make it the last!” I decided to master blocking his attacks before even attempting to move my lance, but found myself knocked off my horse repeatedly. “Alas! All Camelot will grieve to hear that valiant King Arthur was slain by the Black Knight.” I restored, grit my teeth, and prepared to try again.


Looks awesome doesn't it!


It's not! There were even times when we both went down but it was marked as only a loss to me.

I’ll cut to the chase here and say that this section of the game was all but impossible to play as it was designed. I don’t know if it has anything to do with DOSBox or whether it was always this hard, but I found it very frustrating indeed. I eventually figured out that I could knock the Black Knight down easily enough, by simply moving my lance to the left of screen just as he was nearing me, but actually blocking his lance intentionally was just blind luck. Eventually I pretty much ignored my shield and concentrated on knocking him off. A few well timed blows combined with a couple of very lucky blocks resulted in victory, but I didn’t feel good about it at all. “You have vanquished the Black Knight, King Arthur!” The companion comments I’ve read seem to suggest I’m not alone in my dislike for this mini-game, so I’d be very interested to hear from anyone that actually mastered jousting. Once it was over, the Black Knight’s body simply vanished, “as is to be expected with such a supernatural being”, so I left the field of battle to venture deeper into the Forest. On the next screen I found Gawaine, tied to a tree and dying! “King... Arthur... I knew... you would come.” I cut his shackles with my sword, and as he slumped to the ground, Gawaine told me to “Beware... the Mad Monk... of Glastonbury. I believe he has... the Grail.”


Ah yes, very realistic!


When a hero is needed, I can't help but respond!

I tried to talk to Gawaine, but he seemed unresponsive. I tried to help him in various ways, but the game kept telling me that he would die of his injuries if I didn’t get him to Camelot soon. Eventually I tried picking him up and putting him on my horse, and it worked! “Your horse will carry him safely back to Camelot. Even if you must go on foot, you must continue your search without delay, but be assured that this noble sacrifice brings blessings upon you.” I was losing animals left, right and centre now, but I continued on to the right of screen on foot. The next screen really caught my attention! I’d entered a circle of large upright stones, and in the centre of it stood an old hag on top of a pedestal! Merlin clearly sensed danger: “Beware, Arthur! I like not the look of this old hag who stands upon the pedestal.” What was particularly worrying was that investigating the smaller stones within the circle revealed that they were once men, clearly having been turned to stone by some sort of evil magic. As I approached her, the hag spoke the following words: “Halt! Ye shall not pass me unhindered, king though ye be. And if ye give me not what I desire, a stone ye shall be. And what may this be that I desire, ye wonder? Hah! If ye be so cunning a knight, ye shall know.”


Just for clarity, which god are you talking about in this instance?


Smurfette was going through her rebellious stage!

What could she possibly want? I hardly had anything in my inventory! It was then that I noticed the “magickal” sleeve that I’d picked up in the forest, and decided it was worth a shot. “Aye! Aye! That is what I most desire! Bring it here at once!” I tried to think of why she might want the sleeve, but couldn’t come up with anything. Figuring it must be from some story I wasn’t aware of, I walked up and gave it to her. Before my eyes, the hag transformed into a much more aesthetically pleasing woman! “Bless you, valiant knight! I am the Lady Elayne, transformed into the forest witch by a hideous spell cast upon me by the Black Knight. Only this sleeve, which I gave to my true love, could set me free. And if my sleeve is here, my beloved cannot be far away. I must find him at once! Fare thee well!” The Lady Elayne then ran off in the direction I’d just come from, and presumably would come across the bones of her lover soon enough. With the hag out of the way, I was now able to read the runes on the pedestal she’d been standing on. “Five poets bold did come astray. Five standing stones now bar the way. Of limbs bereft, yet voice I left. To pass through the middle, you must ask for...” The writing faded away at this point, so I was not able to read what the final line was supposed to say. It seemed obvious to me what it was supposed to say though, as "middle" rhymes with "riddle"!


"My darling...as a sign of my true love for you...RRRIIIPPP...I want you to have this sleeve!"


...a fiddle? Um...

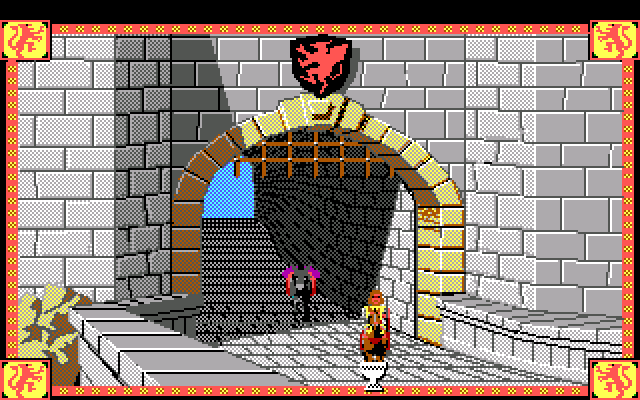
I walked through the arch to the left of screen, and was surprised to find my mule eating grass. “You have reached the base of Glastonbury Tor on the edge of the Forest Perilous.” OK, so the slope leading upwards behind my mule must take me to the ruins where this Mad Monk resides. I tried to walk in that direction, but suddenly was thrown backwards by an invisible force! “You were thrown back by a sorcerous barrier of great power. Yet there must be a way to pass it.” It was only then that I noticed the five stones, and remembered the riddle I’d just read on the pedestal. “Five poets bold did come astray. Five standing stones now bar the way. Of limbs bereft, yet voice I left. To pass through the middle, you must ask for the riddle.” I typed “ask for riddle”, but that didn’t work. I tried “read riddle”, but was told that “The only riddle to read here is that there is no riddle here to read.” Hmmm…what about these poets? I walked up to one of the stones and typed “talk to poet”. The stone responded!!!! “You can see nothing else when you look in my face, I will look you in the eye and I will never lie. What am I?” Given my experience with creating riddles for the blog, I felt confident I could figure this out, and any other riddles the poets could throw my way. After a few moments thought, I typed “mirror”. The stone lit up with a purple light, and I received a message telling me that I’d solved its riddle. One down, four to go!


Whatever you do, don't whiz on the electric fence!


The Riddling Stones demanded satisfaction...sorry, that was the best I could do

The second riddle I was given was: “To unravel me you need a simple key, no key that was made by locksmith’s hand, but a key that only I will understand. What am I?” Hey, that’s easy I thought! It’s a…um…aahhh…hmmmm…a code? No? My expectations that I would breeze through these riddles were shattered, and things didn’t get any better when I read the other three riddles. The third riddle was “When I am filled I can point the way. When I am empty nothing moves me, I have two skins, one without and one within. What am I?” The fourth riddle was “You heard me before, yet you hear me again, then I die, ‘til you call me again. What am I?” Finally, the fifth riddle was “I go around in circles but always straight ahead, never complain no matter where I am led. What am I?” I put a little bit of thought into each of these riddles, but couldn’t come up with an obvious answer for any of them. I left the game to have dinner with my wife and daughter, and it must have been very apparent to them that my mind was elsewhere. Each of the riddles (well, the three that I could remember anyway) were going around and around in my head while I sat silently and unconsciously chewed my food. By the end of that meal, I’d solved two of them! The third riddle was obviously a piece of clothing, probably a glove, while the answer to the fifth one just had to be a lodestone!


I imagine anyone that missed the lodestone earlier in the game would struggle to solve this riddle

I excused myself from the table and rushed back to my laptop, desperate to try out both answers. To my delight, they were both correct! Three down, two to go! It took me a couple more minutes of thinking to figure out that the answer to the second riddle was in fact “riddle”, but I was really stuck on the fourth one! I tried to think of things that made sound intermittently, but it was only when I focussed on the “til you call me again” bit that I had a eureka moment! I pictured someone calling out and the word “echo” came to me. I knew it was right as soon as I thought of it, but I was still hugely excited when the fifth and final stone lit up! I was now able to walk between the stones, but as soon as I did, I simply disappeared! Merlin panicked, asking “Arthur? Arthur! Where are you?”, but soon calmed down when I reappeared in the ruins of Glastonbury Tor. “Ah, there you are! That was not my doing. You have been brought by another power to the center of the ruins of Glastonbury Tor.” I was able to leave this screen in all four directions, so I just had to pick one. I went south, and found myself standing near a well. There was a man sitting nearby, and from his clothes I had to assume he was the Mad Monk I’d been warned about!


Ooovvveerrr heeerrreeee!!!!!!


Medieval rest rooms didn't offer the privacy we take for granted these days

Strangely, I wasn’t able to right click on the monk to get information about him, so I decided to focus on the well before approaching him. “The well lid is iron, with a solid iron bar and a lock holding it in place.” I tried a few things to get the lid open, but it clearly wasn’t going to happen without a key. When I right clicked on the tree to the right of the well, I was unexpectedly given a heap of information about it. “The legend of Joseph of Arimathea has it that when he hid the Grail, he also stuck his staff into the ground and from that place a thorn tree grew.” As with Old Father Tree in the Forest Perilous, I didn’t seem to be able to interact further with the thorn tree, so I had to assume it was one of the “extras” I spoke about earlier. It was time to deal with this monk, so I typed “look at monk”. “This Monk seems calm enough. Perhaps he is not the one they call the Mad Monk. We shall see.” I walked towards him, and to my surprise, he simply stood up and quickly walked away to the west. I decided not to chase him and to instead concentrate on exploring the environment. With that in mind I continued south, reappearing on a screen containing a large altar in its centre. “It is an extremely ancient altar, of a most peculiar configuration. Its three parts may hint at the worship of a trinity of some sort.” Hmmmm, interesting! What could the altar be used for?!


I hope I wasn't supposed to do something with this tree...because I didn't!


A fair amount of attention was given to making all the shadows consistent in each section of the game

I soon discovered that continuing south brought me back to the starting point, and walking in the east and west directions took me through pretty much empty screens of ruins before also looping back. The monk appeared repeatedly throughout this exploration, and ran away whenever I got too close. If I talked to him, he would respond with “As you can see, I am but an old, poor helpless monk seeking enlightenment through solitude. I am amazed you have passed the riddle stones, for your own face betrays no great intelligence.” His condescending words convinced me that he was indeed the Mad Monk, but what was I supposed to be doing on this strange hilltop? Eventually I thought I would try asking him about the Grail, at which point he became very agitated! “Thief! Robber! You come seeking treasure, but you will find only death! The power is mine! Mine! I will never share it!” He then ran away again, but this time I followed him. I wasn’t prepared for what I found on the next screen! There were now three Mad Monks running around swinging clubs! “Those glazed, fanatical eyes filled with hatred, those snarling lips flecked with foam! The Monk truly is a madman!” Luckily the monks moved with little purpose, so I was able to regain my wits and draw my sword. As each of them came towards me, I thrust my sword in their general direction (farting didn’t seem a likely solution). All three went down with a single blow, and somehow I managed to avoid all of their wild swings!


Caption Contest


Captaaaain Caaaaavvveemmmmmaaaannnnn!!!!!

The monk cried out “Arrghh... in vino veritas...” as he died, and then disappeared, just as the Black Knight had done. However, in his place appeared three glowing orbs with tentacle-like appendages!  “We are the Old Ones and you have killed the monk, our servant, the only servant we have had for centuries. You must take his place. You will never leave here, unless you can appease us for this loss.” Having made this statement, the Old Ones faded away, leaving me to wonder exactly how I was supposed to “appease” them. I still wasn’t able to get into the well or do anything with the tree, which left the altar. Since the altar had three parts, hinting that it was used to worship a trinity of sorts, I tried standing in front of it and praying to the Old Ones. They reappeared behind the altar and proclaimed that “Copper is for the lowest spirits of the earth. Gold is for the young gods. You cannot appease us with those metals. We three are the eldest servants of the mother-moon. We love most dearly the metal that gleams cold and pure like hardened moonlight.” Clearly they wanted silver, so I placed a single silver coin on the altar. “We need more silver to appease us.” I placed another coin, and another, and another, until there were five silver coins on the altar. “Glorious silver! How pure and perfect it is! Having silver is better than having a servant! We release you from our service and leave you a gift.”


Turning to the bottle will not solve your problems you mad bastard!


Hey, so this is what happened to The Young Ones!


Just imagine how excited they'd be about the Silver Surfer!

In place of the silver coins lay an iron key, which I eagerly picked up. I walked up one screen to the well, and used the key on it to unlock it. Inside was...water! I’m not sure what I’d been expecting, but it was certainly more than water. I tried getting into the well, but wasn’t able to. I then tried drinking it, and found that I could, but apart from being told that the water was ice-cold, nothing happened. After a few more failed attempts, I typed “put hand in water”, and watched as Arthur fished around for something. “So THIS is the Mad Monk’s treasure! A beautiful, glittering crystal heart. How cold it is to the touch! Alas, Arthur, this is the object of power that created the Spell of Circular Entrapment.” I would now be able to leave Glastonbury Tor, but where would I go next? The game had made a real point of mentioning how cold the crystal heart was, so perhaps it was the item that the Lady of the Lake wanted brought to her?! There was only one way to find out, and that would involve navigating my way back to the Lady’s ice palace. Regardless of the outcome, I was making some serious progress, and thoroughly enjoying the experience too. Conquests of Camelot hasn’t been overly difficult so far, but I have had to use my brain on a few occasions. I just have to hope that future action mini-games aren’t as clunky as the Black Knight sequence. Join me in a few days to find out!


Yes! I knew it! Oh...hang on!


I think I know someone that will REALLY like this!

Session Time: 1 hour 00 minutes
Total Time: 3 hours 00 minutes

Note Regarding Spoilers and Companion Assist Points: I've written a set of rules regarding spoilers and companion assist points. Please read it here before making any comments that could be considered a spoiler in any way. The short of it is that no points will be given for hints or spoilers given in advance of me requiring one. Please...try not to spoil any part of the game for me...unless I really obviously need the help...or I specifically request assistance. In this instance, I've not made any requests for assistance. Thanks!

Monday 25 November 2013

Game 38: Conquests of Camelot - Throwing Down the Gauntlet

King Arthur Journal Entry 2: "The strangest thing happened today. There I was just minding my own business, when this guy just started screaming in the middle of town! He fell to his knees, clearly in great distress, and then all of a sudden he was just...gone! Anyway, I've got enough troubles to deal with to worry about someone else's crisis. After all, I had to fight three wild boars today, all of which seemed intent on ending my royal life! Luckily I'd only recently purchased a spear off a gluttonous hunter, which apparently has magical properties (well at least it did while I remained in the forest). Just when it seemed things couldn't get any worse, now I've run into the Black Knight (yes, THE Black Knight)! Apparently I only have to challenge him to a joust to free Gawaine, but given his invincibility, I'm having a damn good think about it. I'm surprised at how much of a nice fellow he is! Ah, I guess I better make a decision..."


The King and his ass

It’s always nice to be given a few choices in adventure games. So often developers fall into the trap of thinking that solid stories require entirely linear gameplay, and I don’t think that’s absolutely the case. Like most things in life, balance is the key, and from what I can tell so far, Christy Marx tried to find this balance with Conquests of Camelot. After leaving Camelot for the first time, a map of the game area was displayed. It seemed to me that I was now free to go wherever I wanted! I’d gathered a few clues while playing that had hinted as to where I should go (Launcelot went to Ot Moor, Gawaine to Glastonbury Tor, and Galahad to Southampton), but what if I chose to take my own path while searching for the Grail? The answer of course is that clicking on any of the other locations resulted in variations of the message “There is nothing of worth to milk from Braunton”. This lack of true freedom is one of the things that separate RPGs from adventure games. There’s a trade-off between a focus on story / puzzles and freedom / choice, with games like Hero’s Quest successfully sitting on the fence (which is probably why I love it so much). So how well does Conquests of Camelot manage this balance? You’ll find out soon enough!


We dine well here in Camelot. We eat ham and jam and spam a lot.

I had to have a think about where I might go first. In the end it was my excitement at visiting the Lady of the Lake that decided it for me. I clicked on Ot Moor, and seconds later watched Arthur riding his horse into a snow-filled area, with mule not far behind. I could see a palace off in the distance, but there was no path to take that went in that direction. I continued to the right of screen until I arrived at a frozen lake. Unsurprisingly my horse wasn’t all that keen to step out onto the ice, so I hopped off and went by foot. Luckily I’d saved my game, as just a few steps out onto the ice and I fell straight through it to my death! I restored and tried again, thinking that there must be an invisible path that I was supposed to take across the lake. If I took one step at a time, and listened for cracking ice, I could possibly edge my way across, only there appeared no way to successfully do it! I tried numerous times before finally sitting back and pondering what to do. Was there something in my inventory that could help me? The lodestone told me which way was north, but that didn’t do me much good. The rose? Had Gwenhyver said something important when she’d given me the last rose in her garden? “Wear it next to your heart. In time of need, it will guide you through danger if you recite the Message of the Rose.”


Off to Ot Moor we go!


Haha, I'm like Jesus, yo! Walking on water and shit! This is so cool, I wish someone could see...


...aaaaaaahhhhh!!!!!!!

This certainly seemed like a “time in need”, so I opened the Liber ex Doctrina (ie. the manual) and turned to the Message of the Rose page. There were lots of different flowers listed, along with their meanings, but how could I recite the message? The answer was right in front of me, but I failed to see it for a couple of minutes. Below the image of a flower were the words “LOVE IS MY SHIELD”. I typed the message, and a patch of swirling particles appeared and began moving away from me across the ice. I tried to follow, but fell through the ice again! I restored and this time made sure that I stayed within the protected area as it zigzagged across the screen. It was working, and I managed to stay with it across three or four screens until finally arriving at the palace doors. A message told me that “The petals disperse in an icy wind. You are no longer protected by its spell of guidance.” So that’s what the particles were. Flower petals! I saved my game again and entered the palace, walking in on quite a scene. “Here stands the Ice Maiden, a cold and unloving manifestation of the Lady of the Lake. Near her is Sir Launcelot, imprisoned in ice.” When I looked at the Lady, I was informed that I must find a way to win her good will if I wanted to free Launcelot.


You'd think the magic would lead me directly to the palace right. Oh no, it had to zigzag all over the place!


This is all very similar to the ice castle on a lake from 1984's Conan the Destroyer!


Hmmmm...cozy!

I spoke to her, and she professed knowledge of where to find the Grail! “I sense the presence of Merlin. But I know that which he does not – where to search for the Grail. But to win my help, you must find and return an object of power that was stolen from me. Go, and I will transport you safely across the ice. Do not return unless you bring it to me!” Before I could do anything else, I was transported back to my horse and mule, wondering what it was I was supposed to give her. Clearly I didn’t have it yet, and my original excitement at seemingly having choice in Conquests of Camelot diminished somewhat. I hadn’t exactly been dead-ended, but I may as well have been. The game had given me the option of where to travel first, but I’d chosen incorrectly, which kind of defeats the point of having a choice in the first place. It was all made a lot worse though, because as much as I tried, I was simply not able to climb back onto my horse. I’d climbed on previously by typing “get on horse”, but that was now met with “Your horse is too wise to venture onto the ice”. I of course had no intention of venturing back onto the ice just yet, but no matter what I typed, my damn horse was having none of it. Eventually I tried just leaving the horse there, but trying to leave without it caused the following: “You will find the trip even longer and more tiring without your horse, Arthur.” In the end I had no choice but to restore back to Camelot and ignore that I ever went to Ot Moor.


Oh come on! I just walked across miles of thin ice to get here! And seriously, do you have to use that font colour!?


But not wise enough to know that I wish to go in the opposite direction.

This time I decided to go to Glastonbury Tor, since there seemed no point in following Galahad across the open sea just yet. After selecting my destination, I reappeared in the ominously named Forest Perilous, which must be travelled through to reach the hill of Glastonbury Tor. On arrival there was an odd shrine in front of me that seemed to contain some sort of green statue. I looked at the shrine, and was told that “It is an old, bronze statue of Cernunnos and he holds out a cup for offerings.” Cernunnos is a Celtic god in human form, yet with antlers on his head. He is considered to be the God of nature or fertility, although there doesn’t seem to be a lot of historical information regarding his place in Celtic religion. As I approached it, a red creature named Widdershins jumped out and made a reasonably specific demand! “Copper or tin! Copper or tin! Copper or tin for Widdershins! I am no troll but that is my toll! Copper or tin for Widdershins!” I had a bunch of copper in my purse, so I gave him one single coin. This seemed to appease him: “Copper is mine! Copper divine! Go your way. No trick I will play!” With that he disappeared, and I was free to explore the screen further and then travel deeper into the forest. I couldn't find anything else of interest, so I moved on to the next section of forest.


The Forest Perilous! I have to go through the Forest Perilous!!??


I hope the locations continue to have such contrasting environments.


Well at least the little dude is easily satisfied!

To my right stood a hunter, and there were several pelts drying on sticks nearby. When I spoke to him it was clear that he was a poor man, and getting anything out of him was going to involve some form of “charity”. When I tried asking about Gawain, he responded with “Even one copper coin would be of much use to me, sire, and help greatly to loosen my tongue.” I obliged, and he offered his assistance, as well as giving me a word of warning: “Beware the Mad Monk of Glastonbury!” Fortunately the hunter did have some information for me regarding the missing knight, announcing that the “goodly knight came this way and rode on into the Forest to reach the Tor where he hoped to find the Grail”. Sadly that was the last time he saw him though, which meant he either didn’t make it or was still on the hill somewhere. I asked the hunter about this Mad Monk, and was told that he had “surrounded the base of the Tor with a sorcerous barrier and stones that speak”. Finally, the hunter offered to sell me his pelts for a silver coin, but I saw no reason to buy them, particularly as I would not be able to return to Camelot to get more coins. I did try it though to see what would happen. I gained no points for it, and didn’t even get the pelts (the hunter told me he’d take them to Camelot personally).


Since when must your King pay you to serve him, peasant?!


Stones that speak you say! I don't suppose you've been partaking in strange mushrooms have you?

I felt I’d finished with the hunter, so I walked my horse to the next screen. As I did so, my mule appeared to get scared and bolted back in the direction of Camelot! I pushed on without it, and was told that I could hear something rustling in the bushes. It was a boar, and after a brief pause it rushed me and knocked me off my horse! This ended my life of course, so I was going to have to restore and figure out how to avoid or defeat it if I wanted to progress. I tried getting off my horse but was told that wasn’t a good idea, so could find no way to get past the vicious animal. After two or three crushing defeats I noticed on restoring that the hunter was holding a spear! This seemed an ideal weapon to kill the boar from horseback, so I asked him about it. “The boar spear once belonged to the Black Knight and is powerful enough to kill even the giant boars of this Forest. He has laid an enchantment on it so that it belongs to the Forest and cannot be taken from here.” I offered to buy it from him, and thankfully he agreed to do so for one gold coin. I paid his price, and the hunter fastened the spear beneath my horse’s trappings. I was now ready to face the boar again, and the hunter warned me once again that the power of the spear would only exist within the Forest.


Oh you think this is funny do you!?


You mean, from your left hand!?

Once I returned with the boar spear, there was an instruction on the screen to press the spacebar to “Thrust Spear”. When the boar charged me, I simply pressed the spacebar at the right time to take it down! Victory... or so I thought! After a couple more steps, another boar came out of the bushes and charged me, knocking me off my horse after my mistimed thrust. There was no way of saving once I’d entered the screen, and it turned out I needed to thrust my spear into three boars at precisely the right time to be able to progress. I have to admit this took a few goes, despite being sure I’d nailed it on more than one occasion. I managed eventually, and trotted away from the bloodbath feeling only mildly triumphant. As soon as I entered the next screen, a crow began speaking to me! “O Fool, you seek death by coming here. Turn back now or die!” Beneath the stone that the crow rested upon were the bones of an unfortunate soul, and there were some mushrooms to the left of screen. The large tree next to me caught my attention too, so I right clicked on it to see whether it had any relevance. “’Tis a Father Tree. Sometimes if you are worthy enough, such wise and ancient beings will even speak with you.” I typed “talk to tree”, and the response I got wasn’t an inviting one. “Who dares to speak to Old Father Tree? You are but a twinkle in time, mortal. Let me sleep long and dreamless sleep of deep roots and sun on branch.”


This third one really troubled me for some reason.


Aha! There are the mushrooms...


...and now I'm talking to birds and trees! These are fantastic!

This wasn’t the first time that the game had made part of the scenery seem important, only to reverse the sentiment a short time later. When I tried to talk to the tree again I received the following: “Do not disturb him further, Arthur. He is an old and weary tree.” It's unusual for superfluous events like this to occur in adventure games, but I don’t mind it at all. It’s not realistic that everyone and everything you come across should play an important role in your quest, so it’s nice to feel part of an environment where there are “extras”. The mushrooms were similar in this respect, as I wasn’t able to do anything with them, despite being informed that they were of “the species Amanita Muscaria” and are “very dangerous at the best of times, and said to cause madness or death”. As I approached the crow, it spoke to me again: “Hear me, then, O Brave Fool. The Black Knight is the greatest of all knights. None have beaten him. His is invincible. Even Sir Gawaine was grievously wounded. The Black Knight awaits you for a joust to the death. Do you accept the challenge?” What else could a brave knight do but say “yes”?! The crow told me I was a fool, before flying off to the right of screen, presumably to tell the Black Knight of my answer. Before I followed it to my apparently inevitable death, I spent some time checking out the corpse.


Clearly this Black Knight has never gone head to head with me! After all...I'm...still alive!

“Naught is left but a bit of armour, his bones picked clean by the crow, and a bit of brightly colored silk. Odd. Although this lady’s sleeve has surely been here as long as the dead knight, it is as new as the day the lady wore it. There is magick involved here.” I picked up the sleeve, and then after a deep breath, prepared myself for battle. As soon as I entered the next screen, the Black Knight was waiting to joust. He did give me a choice though: “In the forest beyond me, I have imprisoned your friend, Sir Gawaine. He is sorely injured and shall die soon without help. To free him, you must joust with me. Three times you must unhorse me before I can die. Three times must I unhorse you to slay you. The first knight to strike the third blow is the victor. No matter who wins. Gawaine will go free. But if you joust with me, you will surely die. Therefore I give you one other choice: I will let you pass untouched… but I will take Gawaine’s life in exchange. I lay the challenge before you. Will you joust with me for the life of Sir Gawaine?” The only honourable thing to do would be to accept the challenge, but you’ll have to wait for my next post to see how I fared. I’m really enjoying Conquests of Camelot, despite a few bugs and flaws doing their best to taint the experience. Some of the comments from other companions on the blog hint at nasty dead-ends, so I’m really hoping I can avoid those. If I don't post within the next few days, I guess I perished in battle!


Oh yes, there is definitely magick involved here! Not magic mind you. Magick!


Can you repeat the bit about you being invincible? I felt like there was something important there.

Session Time: 1 hours 00 minutes
Total Time: 2 hours 00 minutes

Note Regarding Spoilers and Companion Assist Points: I've written a set of rules regarding spoilers and companion assist points. Please read it here before making any comments that could be considered a spoiler in any way. The short of it is that no points will be given for hints or spoilers given in advance of me requiring one. Please...try not to spoil any part of the game for me...unless I really obviously need the help...or I specifically request assistance. In this instance, I've not made any requests for assistance. Thanks!

Saturday 23 November 2013

Game 38: Conquests of Camelot - If You Want Something Done...

King Arthur Journal Entry 1: "Gawaine, Launcelot and Galahad have not returned from their quests for the Grail! I can no longer call on my people to do my bidding. I have prepared to leave Camelot to find out what has happened to them, and in doing so will push on in search of the Grail myself. It's not as though my presence here brings any joy to this cursed kingdom, with the people starving and my dearest Gwenhyver loving another man. The answer to our woes must be held within the Grail, and so must I possess it for the good of all!"


Home, sweet home

I’ve had my first go at Conquests of Camelot, and I’m not really sure what to think just yet. It’s interesting for sure, but it also seems a little clunky at times, particularly after the polish of Loom. Before I walk through my experience so far, I need to spend a bit of time describing what occurred in the game’s lengthy introduction. It starts with a view of King Arthur’s castle in Camelot (Arthur is the game’s protagonist in case you hadn’t guessed). The narrator, Merlin the wizard, described the vast kingdom that Arthur has earned through “strength, spirit, skill of sword and quickness of mind”. Not only has he defeated numerous armies on the battlefield, but he also has the beautiful Gwenhyver as his Queen. However, not all is well in Camelot, as Gwenhyver has fallen in love with another man… Sir Launcelot! Launcelot holds a place at the Round Table, along with the likes of Kai, Ector, Gareth, Percival, Gawaine and Galahad. He is such a “chivalrous, brave and true friend”, that King Arthur chooses not to bring harm against him. Merlin informed Arthur that this choice not to put a stop to the love shared by the Queen and Sir Launcelot has brought a curse upon the kingdom, with rotting fruit, diseased grain and foul wells the result. Yet just as all appeared lost, a vision of the Holy Grail covered in a white cloth appeared in the centre of the Round Table. Thus did the search for the Grail begin!


Yeah, she looks pretty hot! Not sure about the huge bushy beard though.


Some poor dudes worked their whole life to become a knight, only to be included in the "many others" collective.


As your king, I demand to know this secret!


Arthur liked to ride by his adoring fans

Three knights ventured forth to seek the Grail, being Sir Gawaine, Sir Launcelot and Sir Galahad, yet none have returned. It is now up to Arthur (aka me), to begin his own search. For anyone to find the Grail, they must surpass tests of physical, moral and spiritual strength.  The introduction finished with Merlin informing Arthur that he would be with him throughout his journey, if only in spirit (ie. he’s not coming). With all that done, I was given control of Arthur, but found myself with a strange view of proceedings. I could see the layout of Camelot from above, and could move around from room to room using either the arrow keys or the mouse. On entering a room, I was given a brief description of what it was, but what I didn’t realise at first was that clicking on it again would cause me to enter it. I therefore wandered from room to room, finding out what each of the white shapes represented, but not actually seeing anything within it, until I accidentally entered one. It was the Queen’s Bower, and within it I found Gwenhyver seated in front of a dried up fountain. It felt strange to use a parser again, but I quickly discovered I could also get a description of anything onscreen by right clicking on it. Right clicking on the red rose in the foreground revealed that “There is only one rose left in her garden, but I have no doubt she would be glad for you to have it”. I typed “get rose”, and added my first item to my inventory.


I'm sure there are other knights that I can send first!?


Really? This is my kingdom? What is it...about 10 metres squared?


Is this meant to be some sort of metaphor for my marriage?

As I picked up the rose, Gwenhyver spoke: “Wear it next to your heart. In time of need, it will guide you through danger if you recite the Message of the Rose.” I then typed “look at gwenhyver”, and was told that “If there is any news of Launcelot, Gwenhyver is bound to know it.” That seemed a hint that I should ask her about him, so I did. “Ah… uhmmm… we are just good friends. However, it is true that I was the last person to talk to him before he went seeking the Grail. He said he would seek information from the Lady of the Lake. The watery tart.” This seemed important, so I noted down that Launcelot went to see the Lady of the Lake. Since I now had something in it, I decided to see how the game’s inventory worked. It was basically a list, and selecting an item on it merely showed me a small image of it. To get a detailed description, I would have to type “look at rose”. I couldn’t find anything else to do in the Bower, so I left and made my way to the next room of interest. It was the Treasury, where my coins and other valuables are kept, yet the room’s description made a point of telling me that the “bundles on the right are new, though”.


You could have at least tried to be convincing!


Very simplistic inventory, but it will do


What?! This cannot be all the treasure I have!? I've defeated nations!

I was more interested in the chests on the left, which were surely filled with treasure. When I tried to open them though, the buff looking treasurer told me to leave them alone. “Nay, leave it be. Your mission must be kept humble, for safety as well as your soul’s sake.” I got over that disappointment quickly, and wandered over to the bundles to the right of screen. When I tried to open those, the treasurer interjected once again! “It was sealed by Sir Gawaine when he left it here, and he charged me to see that the seal is not broken except by his own hand… unless he is dead.” Hey, isn’t this my kingdom!!!??? *sigh* Well, surely I would be able to wander over to the treasurer and take handfuls of those coins he’s guarding! I tried, but found I was a little bit stuck behind the bundles. I’d walked around the pillar in case there happened to be two different bundles that needed investigation, but didn’t appear to be able to get back out. I tried everything I could, but I was stuck!!!! To make matters worse, I hadn’t saved my game at all, so was forced to restart. This was not a massive deal, as I hadn’t got very far, but it was an annoying sign that Merlin might have been correct when he told me things were going to get rocky in Camelot! I hoped this would be the only bug that I’ll come across.


Know your place Treasurer!


I'm just glad I didn't get stuck here after gaining eternal life!

I started again, and still not realising that I could enter the room that I started on, made my way counter clockwise around Camelot. The first location I found was the Chapel of the Two Gods, which held two thrones side by side. Interestingly, these thrones reflected the “power struggle between an old and new religion”, with the one on the left holding the symbol of Mithras while the one on the right the symbol of Christ. I didn’t know much about Mithras, but further investigation revealed that “The symbol of Mithras has emblazoned many a warrior’s shield, for he has been primarily a soldier’s god.” There were two pads to kneel upon in front of the thrones, along with offering bowls, so I thought I’d try praying at one. I kneeled in front of the symbol of Mithras and typed “pray”. “I suspect that an earthly gift may help your prayers to reach the heavens.” The same thing happened when I tried praying at the symbol of Christ, but since I didn’t have anything in my possession since restarting, I could think of nothing to do. I left the Chapel and continued my way from room to room. The vast majority of them held nothing of interest right now, so I wasn’t able to “enter” them. Eventually I ended up back in the Treasury, and this time I avoided the pillars altogether. I decided to focus on the large man that was defending my treasure, and in doing so discovered that the three barrels in front of him contained (from left to right) copper, silver and gold coins.


If you say so.


Gee, what a surprise!

When I spoke to the Treasurer, he had the following to say: “My king, if you seek my advice, I say this – take with you coins of all three value: copper, silver and gold. Each has its use.” This seemed like good advice, so I tried to get some copper. “Aye, gladly, if you will but provide me with the purse to fill.” I of course didn’t have a purse, and hadn’t seen one anywhere in Camelot. Perhaps I would find one in the small tower room in the north east section?! Inside I found Merlin, standing amongst a whole variety of beakers, flasks, herbs and other items associated with magic and alchemy. I starting right clicking on everything I could see, not certain which ones might turn out to be useful. Merlin told me that the herbs hanging on the wall were for both medicinal and culinary purposes, and that I should ask him about them if I wanted to know more. The map on the wall was of the Summer Lands (my kingdom), and Merlin suggested I study it in great detail before searching for the Grail. The chest to the right of screen belonged to Merlin, but he seemed happy for me to look inside. There I discovered a lodestone, which he described as “a magical stone that will always show you where true north lies”. He told me to take it, so I did!


This screen just screams Sierra for some reason. Perhaps it's just reminiscent of both Hero's Quest and King's Quest.


Oh...you mean a compass!

I’ve realised while writing this post that I never tried to interact with the dragon skull or the crystal sitting on the shelf behind Merlin. I’ll restore a game and try to do so at the beginning of my next session, although they both appear too large for me to carry. As he’d suggested I should, I asked Merlin about the herbs on the wall. He described the medicinal and culinary uses for each of them, being mint, basil, marjoram, sage and bay. As an example of the level of detail, this is what Merlin had to say about bay. “To the Greeks and Romans it was the laurel and they would crown their victors with laurel wreaths. Young girls have been known to burn leaves to make lovers return to them. Prophets, diviners and the priests of Apollo considered it to have magical properties. The dry leaves make an excellent flavouring in stews.” Whether or not I need this information at some point in the game, I don’t yet know. The fact that Merlin wouldn’t let me take any of the herbs suggests perhaps not. Having checked out all the items in the room, I decided it was time to study the map. Doing so brought up a full screen view of Britannia Australis, with a bunch of green dots representing places of interest. Clicking on each of them gave me a heap of information about its history and what I might find there. There are way too many, with far too much information, for me to describe upfront here, so I’ll insert images that describe each location as I visit them.


Merlin: The wisest of all men!


Will I really be visiting all of these places? I'm excited by that prospect.

At this point I visited Gwenhyver to get the rose (as I hadn’t since restarting), and the only extra thing I managed to do on this occasion was kiss her (which didn’t appear to achieve anything). It was also at this point that I noticed the game has a unique scoring system. I was going through the menu when I discovered an option to Show Score. My score was split into three distinct headings, being Skill Points, Wisdom Points and Soul Points. I’m not clear on what actions might be allocated to each set of points, but so far I’d only gained 4 out of 368 Skill Points, 3 out of 293 Wisdom Points and 0 out of 358 Soul Points. After leaving the Queen’s Bower, I finally figured out that the starting square was actually my own room, and that I could enter it! *facepalm* It turned out to be incredibly important too, as inside I found my mail tunic, my sword and shield, and my purse! My quest for the Grail would likely end pretty quickly without this stuff, so I went about picking it all up. At first I wasn’t able to get the armour: “You cannot wear armour over your court clothes. Your travelling clothes are in the south corner of your room.” I had to stand out of site down the bottom left corner of the screen and type “get clothes” to change into my travelling clothes, and only then would Arthur put the tunic on.


What a coincidence! I do believe 0 is the exact amount of "soul points" I have in real life too.


What? Sleep...alone!? Surely you jest!


Arise Sir Knight!

As you would expect (if you know anything about the King Arthur story), the sword was Excalibur, given by the Lady in the Lake. The shield was described as the Red Dragon, “in token of your surname, Pendragon, which comes from the Welsh words meaning supreme war chief”. I was particularly excited about having the purse, as now I would be able to get the coins from the Treasurer. I quickly made my way to the Treasury, gave the purse to the man, and then asked for copper, silver and gold coins. The man obliged, and once he’d filled the purse, I made my way to the chapel to see if I could donate a couple of coins for blessings. I forgot to get the purse back off the Treasurer before going to the chapel the first time, which was a bit stupid! Once I did have my coins on me, I found I could choose which type of coin and how many I would like to put in the bowl. Trial and error led to me figuring out that the correct choice for both shrines was a single silver coin. When I placed a silver beneath both symbols, a message stated that “The sacred flame is lit. You and your mission have been blessed.” I felt like I was ready to depart Camelot at this stage, but there were a couple of things I wanted to try beforehand. Firstly, I refilled my purse with coins, negating the two silvers I’d just given away. Secondly, Merlin had told me to see him once I’d finished my preparations.


Come now, don't be shy. You can fit a few more in there!


Surely both religions can't be right!

I made my way back to the magician, and he had the following message for me: “The search for the Grail will be long and difficult. Though I will not physically travel with you, my spirit will be with you to guide and advise as I am able. Choose carefully where your search will take you, for once you leave Camelot, you may not return.” This speech wasn’t as inspiring as I’d hoped, and didn’t give me any clue as to where I might travel to first. I knew from Gwenhyver that Sir Launcelot had gone to visit the Lady of the Lake, but I didn’t know where Galahad and Gawaine had gone. I asked Merlin about Galahad, and he responded with: “He is very popular among your guards and they would be first to hear rumour of him.” That was good to know, but I hadn’t actually come across any of my guards just yet. Perhaps I would later. I asked him about Gawaine, and was told the following: “I believe the Treasurer is a good friend of Sir Gawaine and would have the latest news, if any.” Of course! Gawaine had left a bundle with the Treasurer, but I’d not asked him any questions. I raced over to the Treasury and asked. “I was the last to see Sir Gawaine. He made sure to take copper coins along with silver and gold. He told me he planned to search for the Grail in the ruins of Glastonbury Tor. That is the last that I, or any man, had heard of him.”


Is there any other information you are withholding peasant? Be out with it!

Well at least now I knew where two of the three knights had gone. With nothing else to do, it was time to exit Camelot into the outer courtyard. On arrival, I found a mule and a horse awaiting me, alongside four guardsmen. I immediately wondered whether these guards could tell me where Galahad had gone! I approached the first one and typed “ask about galahad”: “I have no news of him, m’lord.” Well that was disappointing! The second and third guards gave me the exact same response, which didn’t give me much confidence that the fourth and final one would have the answer. “His horse was sent back to our care by the Harbourmaster of Southampton, along with a message from the Harbourmaster that Sir Galahad took ship to the Far East.” There it was! I had all the items and information I needed to head off in search of the Holy Grail! I hopped on my horse, and trotted out through the gate, with my mule slowly following behind. As I’d assumed I would, I was shortly afterwards confronted with a map of the surrounding landscape, able to click on my first destination. Alas, since this has already been a very lengthy post, I shall cease typing for now. I think I’m actually more excited to get back to the game after writing this post than I was prior. The aforementioned bug got me off on the wrong foot, and I needed to get accustomed to the big drop in visuals after just completing Loom, but there’s no doubt a lot of effort was put into building the world I’ll be spending the next days / weeks adventuring in. My search for the Grail begins now…


Well that's where I shall go...or should it be Glastonbury Tor...or maybe Ot Moor? Decisions, decisions!

Session Time: 1 hours 00 minutes
Total Time: 1 hours 00 minutes

Note Regarding Spoilers and Companion Assist Points: I've written a set of rules regarding spoilers and companion assist points. Please read it here before making any comments that could be considered a spoiler in any way. The short of it is that no points will be given for hints or spoilers given in advance of me requiring one. Please...try not to spoil any part of the game for me...unless I really obviously need the help...or I specifically request assistance. In this instance, I've not made any requests for assistance. Thanks!