Tuesday, 17 February 2015

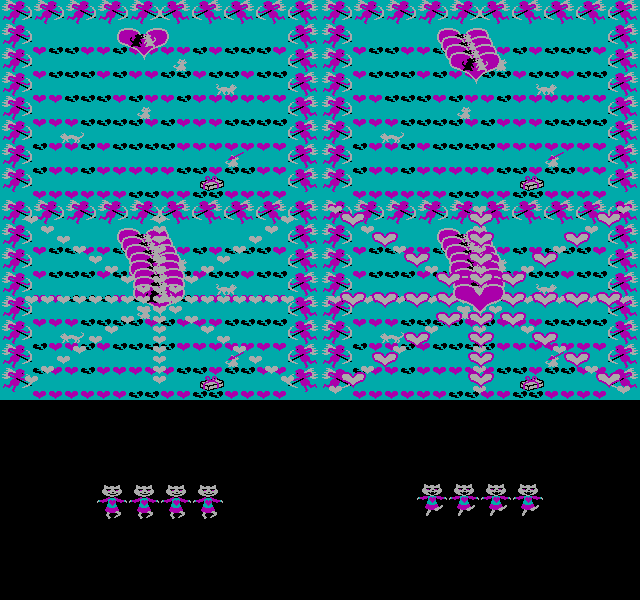
Game 49: Elvira - Won

By Deimar

Jake Spenser Journal Entry #7: "Ok, ok. Let me check the ghost busting manual. Magical sword belonging to a long forgotten king. Check. Six golden keys to open the chest. Check. Burning coal to shot the cannon and destroy the tower hiding said chest. Check. Magic stone to open the tunnel to hell. Check. It seems like is all ok. Time to face the evil witch and get my reward from Elvira. I hope it’s kidney pie. I love kidney pie."

Oh. My. God. This game sure can be frustrating. Even considering I had already played and watched walkthroughs. If you remember, last time I had a little problem with my dexterity score which was making fights really difficult for me. Not that my natural clumsiness was making that part easy anyway. But who doesn’t like a challenge?


He doesn’t. He enjoys beating easy prey like me.

The thing is, I was unable to mix the only spell I thought could help me. And I didn’t have any clue where to get the clover I was missing. Maybe the garden but I hadn’t seen anything there in my last visit. In any case, I needed healing so I mixed a Wooden Heart, the same spell I was given by Elvira at the beginning of the game. I spent all three charges and got back to almost 100 life and 44 strength. And just 27 dexterity…

Well, no sense in crying. I took the sledgehammer and the prayer I found inside the bible in the second floor and ran to the chapel. Only it was more like a walk. A painful and repeated walk. There was a purple soldier in the chapel door waiting for me. These are the most difficult soldiers and they hit like a truck and quite fast also. I tried to best him to no avail, although I took good practice fighting in the screen instead of using the commands. The trick seems to be that is the enemy’s left and right side instead of the screen’s.

And so I tried several different strategies. First I mixed a Brain Ache spell, which slows and paralyzes an enemy, but it did next to nothing. Next round I mixed a Demon’s brew spell, which the manual says is the most powerful attack spell. Two charges worked, but I didn’t want to spent such a valuable resource in this guy. Back to the drawing board I tried mixing a Knightyme Pleasure spell, the most powerful defensive spell, but I was kicked from the game after the third time I failed to give the right ingredients. But Deimar, did you have a brain fart? You DO have a manual with the ingredients, don’t you? I do, I do. But after searching the internet for a bug or something that explained this behaviour I found out that is also a matter of the number of ingredients, not only selecting the right ones (even though there is no number in the recipes in the manual). Great, no protection spell as I hadn’t found the right amount of ingredients apparently. I even tried another healing spell, Clotted Surprise, that did absolutely nothing.

Desperate, I decided to man up and take the purple guy upfront. And by upfront I mean that I used a demon’s brew charge and a crossbow bolt. I don’t know how many charges of the spell I have, but I do know I only need one more bolt.


So… is this where the well of the souls is hidden?

Once in the chapel I approached the altar where the gold chalice was. The gold chalice with an octagonal hole in the middle. Just like the shape of Elvira’s ring. Subtle, isn’t it?. The ring opened a passage under the altar which led to a chamber with a crown in the middle, and a picture at the back with a Latin phrase and the drawing of an angel giving a sword to a knight.


Only the penitent man shall pass

I remembered that a note in the gatekeeper’s office warned about removing the crown, so I let it there for the moment, concentrating my efforts onto the wall. Effort is the name I’ve used to call the sledgehammer. Sadly, it did nothing. They say the pen is stronger than the sword, so I started to pray. In the game too, by reading the one I was carrying. To be fair, the picture also showed someone praying. The wall came down revealing a death skeleton holding a sword. The skeleton seemed to be a king of shorts, but it didn’t have a crown. Hence I put the crown in his head and he allowed me to take the sword. Yes, that means I took it from his cold hands. The sword had the drawing of a hideous monster and a pentacle in the hilt. And I know exactly which hideous monster it was.


He seems so happy with his little toy crown and his little toy sword...

Back to the tower catacombs and to the guy with the stone. Lucky for me, the only enemies I found in the way were the flying skulls, because otherwise I might had been in trouble. The troll was even harder than it looked even considering I now had the right weapon. I managed to kill him in my first attempt, but he took too much life so I reloaded. This fight is special because you don’t have to defend yourself, you just have to spam the attack button until you chop the beast’s hand. I suspect my lack of dexterity was hurting me, but I killed him after receiving just one hit the second time.


Do you want me to give you a hand? Do you catch it? Wink Wink

The runes in the stone told about a hidden passage in the depths of the castle. The crypt he was guarding was mostly empty but for a key inside one of the sarcophagi. Not a golden key, mind you. A rusty key. I was starting to get worry because I was still missing two more keys and I only remembered where one of them was. But I had more work to do down there. I decided to drop the torturer’s bones in the empty sarcophagus and open the water one to see where it would take me.


To the bottom of a cesspool. That’s where it took me.
Become a ghostbuster they said. You will see the world they said.

And it took me to the castle moat after using the rusty key on a gate in the underwater tunnel. I swam a little trying to explore but found nothing. I got back to the tunnel to find a hole in the middle which took me to the bottom of the well in the north east tower. I took some moss in the walls there and used the well’s rope to climb back up.


Beauty is such an empty thing… Just like this moat. Completely empty.

I climbed up to the tower with the cannon and advance a little. There I found a guy which “looks invincible in a close fight”. It’s even stated in the manual. Well, if I’ve learned something from this game is that there is no problem a crossbow to the face can’t solve. The “knight” fell down the walls, presumably to the castle moat. Anyone else coming for another bath?


What’s your favourite colour? Green. NO! Re… AAAAAAAAAAAH!

I hate the castle moat with a passion. Really. It’s fascinating. If you swim at the surface, you can cover like five or so positions in one step. So in order to explore the bottom of the moat you have to dive to the bottom and walk one position at a time. But the moat is four positions deep. And three steps width. And each movement takes some air from you, even turning. Which means that to explore it all and find the knight’s corpse you have to be going up and down all the time. I didn’t even bother to check how long it was before going back to the tunnel’s grate. And there is absolutely nothing in it besides the corpse. Very boring. But I found the corpse. And the sextus (sixth) key which was part of the handguard of the sword.


Somehow I feel the need to search for a puppeteer...

So at this point I was at a total lost about what to do next. I started to explore the castle again, room by room to see if I could find where the missing key was. Most of the enemies were no problem, because they were still red enemies. I think the difficulty increases the more you visit a room, so new rooms were quite easy, as the rest of the castle walls. I didn’t found anything there but a wooden plank in one of the towers which allowed me to see the moat from there.


That moat is deeper than the Atlantic so this doesn’t seem that big of a deal

Back down I went to the dungeons where I had more problems with the enemies, which were green. Took the tongs, without any problem now, but no sign of the key. I re-explored the garden, the keep (taking some burning coal from the kitchen with the tongs), the gatekeeper’s office, the forge, the towers… It was in the stables. Do you remember when I said that getting the torturer’s bones and the golden key there was a bit tricky because they were behind an iron ring that didn’t register as an item anywhere? Well, guess what. There are three “iron ring used to tethering horses”s. Except the third one only says “iron ring”, and is guarding a key. And again it doesn’t register in the room inventory. At least you get it in yours when you drag it. It just seems like these two puzzles were half implemented.

Anyway, time to wrap it up. I went back to the tower with the cannon and did what any sensible person would do. Use the burning coal to ignite it and demolish half of the tower in front. The one from where the knight came. Going there reveals a hidden chamber with a mysterious chest with six keyholes. What could it be, what could it be…


I forgot to wear the casserole and jump inside. Damn it.

Inside the chest, there is a ceremonial dagger and a scroll. I was expecting a good description from both of them but that’s as good as it gets. It seems the developers were as eager to finish as I am right now. Wait for me, Emelda, I’m coming. Yes, Emelda is how the witch is called, although it seems so long ago since we last spoke about her…


At least the devil knows how to make a good presentation when gifting evil daggers and scrolls

I went down to the catacombs and fought my way to the thing I said I missed in the floor in the catacombs entry. There is a new enemy here, which seems to be a scantily clad woman who appears as a ghost and the moment we advance tries to murder us with her dagger. But like the troll, we just have to spam the attack button, which at this point is a relief. The thing I missed is a hole in the floor in the shape of a particular rock with runes which you may remember from this very own post.


To be honest, I’m tempted to let you keep hitting me…

Puzzles 101: Put the thing in the hole with the same shape

Putting the rock opens a hole in the floor which takes us to the lair of the beast. Emelda in all her glory, sitting in an underground throne ruling over the departed. The moment we arrive she stands and tries to steal our vitality. There is a pentacle in the middle of the room, which reminds me of the sword. Using it there stops Emelda's attack. Reading the scroll makes her old again, and a bit of dagger in the chest finished the job. Of course that sequence took a bit of trial and error, but in the end it’s all worth it because we get a lame animation of Elvira and a screen of text telling us congratulations. As if it were a NES game, old school forever.


Amazing, I guess...

UPPER TOWER LEVEL MAP:


The blue squares are position in the open while the white ones are towers. By the way, the road between the SE and SW tower is only three positions. It’s funny how crazy this place is...

DEATH BONUS ROUND (TOTAL DEATHS: 12 and a half)


The crown cannot pass beyond the great stairs!!i

Emelda just sucks me dry

Session Time: 2 hours 30 minutes
Total Time: 7 hours 50 minutes

Sunday, 15 February 2015

Game 47: Spellcasting 101: Sorcerers Get All the Girls - Won!

By Aperama

Ernie Eaglebeak's Journal #6: “Well, that went faster than I'd thought! I'm an honest-to-god hero! I'm gonna save the world! I've graduated! I know all sorts of spells! Well.. I did before I burnt my spellbook. Back. Back, back. After I found the picture of a boa on the surfboard, I realised why it was hidden – it was the way to the very Isle of the Gods itself! After.. doing my humanly duty with Ocarina, Glockenspiel was quite upset that his wife was willing to spend more time with me – but all of the gods forgot pretty quickly when I wiped the legendary garbage dump of the gods clean. I worked out from the brazen trail of breadcrumbs that were left that I was going to have to head down to Fort Blackwand – and sure enough, everything all came to a head. I fought not one, but two mythical beasts, saved my beloved Lola Tigerbelly, and even found out that Joey Rottenwood was the one behind it all after everything! It was pretty satisfying to not only foil his plans, but to cover him from head to toe in whale poop. Anyhow, enough of this journal schtick – it's time I got to know my Lola's.. shopping habits. Sigh. The chores of being a hero..”


Level 5! If only I had some level 5 spells to cast..

I'll admit that while it's felt like a slog from time to time, Spellcasting has actually been quite enjoyable and hasn't actually dragged as much as it has felt it has. All of the puzzles have been largely logical, albeit hindered by the parser and often difficult to work out from what information was given all too often. Not being crazy long is doubtless its strong suit, though. I reckon that with my list of KABBULed names (I kept them all in a separate set of notes) I could probably beat the entire game within about 20 minutes of rote typing now. Anyhow, enough bragging. The opening to the Island of the Gods was quite difficult to comprehend to me – the island is 'locked'. How do you lock an island? Yeah, I'm not sure on this one either. (There's no keyhole.) However, back at the Isle of Bad Puns And Typing 'KABBUL' Heaps – er, the Isle of Lost Soles – we received a 'key'. It wasn't a key to their township, their island, themselves – it was just the only key they could find to give me out of appreciation. But sure enough? It's the key to unlock the very ISLAND OF THE GODS!

All too often this happens! It literally gives you an exact word on screen then won't react to it.
Also just missing in this screenshot: 'You see nothing special about the Condo of the Gods'. ARGH!

The majority of the rooms within this area are actually quite benign. I'm willing to give it credit for at least thinking of a few clever lines – you can VAI (heal) all of the flowers and bushes et al in the Garden, but on trying to GUB (disease) them they either give 'it must be a GUB-resistant strain' or 'I hope you don't think we'd bother making a version of this picture without the flowers just so you could go around casting the stupid GUB spell.' There are lots of things to interact with (well, look at) – but unfortunately, there's not much more to them. The opening room to the Condo of the Gods is a large chamber with entrances to the Garbage Dump of the Gods to the north (living for all of eternity creates quite the landfill, y'see), the room to the east with the condo of Bagatelle, Goddess of peace, and Baccarat, God of war (split perfectly in the center like any number of old sitcoms where 'lines were drawn' between two characters).. and a similar line created between Ocarina, Goddess of Beauty, and Glockenspiel, God of Ugliness, to the west. If one was to have been paying attention back in class (or had they read Ernie's notes), they'd know that both of these two halves were the lovers which created the realm of Peloria through arguments, death and marriage. Essentially, to give a contemporary example, the entire creation of Ernie's home world was an episode of Game of Thrones.

… 'the same headache for sixteen hundred years?'
I'm suggesting that she could do with some really good paracetamol.


Turns out that the Goddess of Beauty doesn't share my love for naked jogs through gardens...


Upon hearing arguing voices, Ernie has the opportunity to hide behind the drapes and ignore the sounds of a lovers' tiff. See, it turns out that Glockenspiel believes that Ocarina has been enjoying herself with other men while ignoring her poor Godly husband. Being the embodiment of Mr. Eaglebeak, I do my utmost to be the true gallant gentleman and offer her the opportunity to show Mr. Glockenspiel that his worries are unfounded – she instead goes on to swiftly turn Ernie into a seven foot tall weightlifter with, as I quote from the game, 'a little love monkey that turns into King Kong'. (Un)fortunately, this only lasts rather shortly – Ernie deflates in more ways than one after enjoying himself with the Goddess.. who steals one of his cigarettes. (He's not even a smoker. I'm beginning to think he's getting advantage taken of him!) She gives him a GWEEK spell box for his troubles – 'shrink inanimate objects'. Glockenspiel chooses now to run in on Ernie – and in trying to find a suitable punishment decides that he can spend the rest of eternity cleaning up the venerable Garbage Dump of the Gods!


Or, y'know, he can just GWEEK the garbage to tiny-size,
then BUNDEROT it to decompose it into nothing. Works, too.

The puzzle itself wasn't particularly difficult to solve, so a quick zap or two and all that's left is a GOBERDUNA spell box – 'tie or untie mighty knots'. As it's unlocked, dozens of gods begin to flock out into the newly-cleaned Big Empty Field of the Gods (patent pending), all declaring that they have their own thoughts as to what this new empty swathe of space could be used for. As they begin to fight, Ernie decides to invoke the better part of valour and run while the going's good. As I've gotten through everything on the map, it's pretty clear that the next stop is the place noted in almost every island that has mentioned what happened around about the time their individual Great Attachment™ to the Sorcerer's Appliance – they had a visit from the seamstresses over at Fort Blackwand. It's one of the only three visitable places on the map that is inland and not shown by a symbol rather than a little 'shield' map dot in the game – there are about a dozen red herring areas to make the game look far larger than it actually is to the outside observer.

Only problem with this plan is the gigantic sea monster..

The Loch Pik Monster was one of those covered in Ernie's General Magic 101 class – it was considered something of a legend. I didn't even have the opportunity to puzzle over it – there wasn't much information given by looking at it, and I just randomly started casting some spells on it to see if it made any difference. Turns out it's quite long, though, and to 'tie a mighty knot' with it is enough to snap its neck. GOBERDUNA Loch Pik monster? RIP Loch Pik Monster.. oops. Plus side? Chapter eight!

I don't understand what screwing has to do with sorcery.
Did this become Handyman's University 101: The Quest To Fix IKEA Furniture?

The game drops us from the lagoon into a room that.. looks identical to the rooms given in the Simulation Lab back at SU! Hope that you weren't like me and didn't leave the sword in the Amazonian shop! I figured I could always go back given the encumbrance kicked in when I tried to pick it up.. instead, I speedran back from first landing on their island. (I lost the lipstick so I couldn't escape the island after retrieving it without restarting.) So after replaying the previous two posts or so.. GUB tree. ZEM me. South. Kill dragon with lead-plated sword that I totally didn't leave back there and ruin Ernie's chance of being the hero with. VAI ivy. Climb ivy. Pull lever. Unchain damsel...


Find childhood crush. Proceed to wonder if unchaining her is the right move
(clearly, because her captors will work out she was unchained – not for any other reasons!)

Turns out that 'he's' down a trap door with 'that machine', or so Lola tells us. The 'machine' is clearly the Sorcerer's Appliance, so the only real question here is as to who exactly 'he' is. I'll admit that my mind innately came up with a few ideas regarding some sort of rival we'd made in our opening few weeks off screen – or, indeed, an angry professor who was somewhat less than impressed with the present establishment of SU. After trying to.. show my appreciation for Lola's fine assets (which in a first was not successful), I found her purse – filled with the essentials. A compact (which Ernie is quick to assure himself he is quite spiffy looking with), a credit card, a tampon, a flame thrower. Just the typical stuff most girls keep in their handbags, I'm fairly sure you'll find. Still, down the trapdoor? A puzzle! It's pretty obvious, though it very nearly again stumped me. There are three coloured 'x's with three correspondingly coloured gates. They each need to be stepped upon to bring up the gate. Ernie's one, and Lola climbed down with us, which just leads us needing a third person or something heavy. I've already lost the lead-plated sword from killing the atomic dragon just prior, so there's nothing in my inventory of note, and BLUBBA just kills us both by flooding the room with whale meat. The only thing in here is a painting of a landscape with a lamp pointing towards it inside..

Three points if you thought of this as soon as you heard I needed a third body


But more importantly – the EVIL END BOSS!
(The graphics often invert every time the 'loading' screen comes up and I'm not sure why)


Thanks for letting us know, Lola! Thanks a bloody well lot!

It turns out that instead of being an angry professor or the like, it's a scorned ex-student that was expelled – and that someone is Joey Rottenwood, Ernie's awful stepfather! He knows of the little prophecy that our mother was trying to let us know about, which is exactly why he married her – it doesn't exactly explain what that prophecy is – but I digress. Joey's plan is to use the Sorcerer's Appliance to supercharge himself with magic, create a rival school to SU and show them how great he is. The problem with his little plan is that nobody actually knows what this is likely to do (hint from if you allow him to: they name the resultant mess that clears out the majority of southeastern Peloria as 'Rottenwood Crater') – he's just learned how to use it in the terms of 'making it work'. In the same way that George W. Bush probably knew that the red button under his desk 'made the nukes work'. Trying to cast any spells results in Joey smacking us for our efforts – and even with ZEM cast, Ernie's not ready to undo years upon years of ingrained beratings and beatings alike and just smack him. The flamethrower doesn't work, either.


The final puzzle of the game. We needs us some whale poop! Problem? Three turns!
We distract Joey by giving him the popular book back from the SU library which is simply too good for him to put down, stopping him from pushing both buttons of the Appliance at once (the explosive option) – but as he settles down to read, he hits the red self destruct lever next to the Appliance. Nobody offers to help out, naturally – we're the protagonist in an adventure game! Dammit, we're the only one who can do anything. So, we need to drop seven tons of whale poop into a convenient receptacle of the Appliance – in three turns. BLUBBA and EKLAKSIA are the clear solution – but there's a problem. Casting BLUBBA has the pressure of a whale dropping from the air force the spellbook out of our hands, and EKSLAKSIA on the ground is clearly what we need to do on it from there. This one took me a little as the nature of 'spell boxes' was never really explained, but it appears that they search for the easiest place to ply their trade once invoked through the book – the obvious stopping spot being a spellbook. After casting BLUBBA to put the whale in its place, we need to use Lola's flame thrower on our own spellbook – then, as we open the EKSLAKSIA box, everyone is given the impetus to begin losing the contents of their collective stomachs.. including the whale, who overfills the receptacle and then some to spray over Joey. Oops! The collective entirety of SU turns out to have been captured around, so everyone gets freed – including Ernie's true dad, who hadn't died after all! A happy ending! Well, sort of..


Fourth wall breaking plot twists? Check!


Can't say I wasn't thorough!

Session Time: 1 hour
Total Time: 7 hours


Friday, 13 February 2015

Missed Classic 5: Wizard and the Princess - Over the River and through the Woods

By Joe Pranevich

Happy Wanderer Travelogue #2: Have you ever had one of those days where you set out to rescue a princess and then you find out that she is hidden in a castle far, far away? I had one of those days today and boy, do my feet hurt! Along the way, I learned a few spells, fed a lion, crossed the ocean in a leaking rowboat, and stole a treasure from a pirate. I can see the mountains in front of me. The princess is close, I can feel it.

Episode 2: In Which Our Hero Traverses More Desert

Deja vu. Didn’t I just solve a puzzle about a snake in the desert?

Last week, the happy wanderer and I solved the mystery of the desert maze and defeated an inconveniently placed rattlesnake. I’m still not sure why I couldn’t just walk around it, but hey: it’s an adventure game. My trusty rock in hand, I set off north to see what new challenges Roberta Williams would throw at us. Unfortunately, those challenges primarily consisted of more desert and more snakes.

The first of these snakes is guarding a hole in the side of a small hill. I can walk past him easily enough, but if I try to find out what is in the hole, he bites me and I die. My trusty rock doesn’t do the trick, so I’m going to need to find another approach. For now, I think I’ll see what else is in the desert and come back later.

This section of desert is at least more interesting than the last, with most screens having something to see or pick up. Very quickly, I find a locket on the ground (inscribed with “LUCY” on the inside), a stick, and a strange note. The note looks like it is written in code, but I do not have a way to decipher it yet. I also find a cracker hidden inside a cactus, which is strange.

Because two snakes were not enough, I also meet up with a third: the King of Snakes. This very important snake seems to have had a rock dropped on him and I am faced with a decision: should I kill him? or let him go? Naturally, I let him go and he rewards me with a magic word: “HISS”. I try it out and am transformed into a snake, but change back after a brief time. It’s pretty cool, but haven’t we had enough snake-based puzzles?

In the far north of the desert, I see the promised land:

The artist wanted to draw “some woods”, but managed to only draw one tree?

Unfortunately, I will need to cross a wide and water-filled canyon before I can escape the desert, but at least I can see that escape is possible. I have a feeling that somehow the solution will involve a snake. Now that I have enough items, I take a break from exploring the northern part of the desert to go back and make sure that I had fully explored the maze from the beginning of the game. I do not find anything new, but there was no way around it. I do not trust Roberta not to have hidden something I’ll need for the end of the game there.

With nothing else to do, I revisit the snake guarding the hole. Assuming that the snake would not attack another snake, I use my “HISS” spell to transform then try to squeeze into the hole myself. Apparently this particular snake is anti-social because he bites and kills me anyway. I check my inventory and try a few objects and one of them does the trick: I can fight off the snake using the stick I found lying in the desert. Once it is driven off, I reach into the hole and pull out another encoded note!

The two notes are written in a sort of code, but are clearly related to each other:


The top one might read “CULUN”, but the bottom one just has me scratching my head.

Because I’m playing this game on an emulator in the future, I print out the two notes and play around with them. I try using a mirror on the center line, or flipping them horizontally. The solution is obvious in retrospect, but I was thrown off because the note with the text on the BOTTOM is actually the TOP of the message. And when you paste them together, what do you get:

Hocus Pocus Alimagocus!

It is obvious that “HOCUS” is my next magic word. I try it out and see what animal it turns me into, but it is not that kind of magic word. I wander the desert from screen to screen, typing “HOCUS” like an idiot before I go to the obvious place, the ravine. When I use the word there, it creates a bridge! With luck, I can leave this desert (and its abundance of snake-based puzzles) behind for good.

Before I cross into the green beyond, one side note: I am starting to suspect that there are other magic words scattered throughout the game. On a whim, I try “LUCY”, the name from the locket, and that is a magic spell, too! When I use it, all of my stuff disappears and I have to reload the game. It must come in handy somewhere, but I can’t imagine how.

Episode 3: In Which Our Hero Is Mugged By A Gnome

Wasn’t that house brown a minute ago?

On the other side of the ravine, I immediately check the house for valuables, but only find an apple. Before I can get anywhere else, something terrible happens: I am mugged by a gnome. I replay the scene a few times, trying to find a way to escape or kill him, but in the end I give up and assume it is supposed to happen. I probably had it coming to me anyway.

Hey, is your name David? Just checking.

I start exploring the forest, but I hit immediately on a new obstacle: a snake. Just kidding! It’s actually a lion and he’s guarding a path down to a beach. In the distance, I can see a sailboat and crystal blue water, but before I start hitting the lion with rocks or sticks, I need to find my stuff and see what else is around.

This side of the ravine is a pleasant forest. There’s a brook where I can refill my water jug, a parrot in a tree, a different tree that I can climb all the way up to get a good view of the ocean, and a hill with a strange crack in it. More importantly, I also find a tree that contains a staircase down to a locked door. Could this be where the gnome has hidden my equipment? I’m not sure, but I cannot find any way to unlock the door so I will need to keep exploring.

Just a thought: we have a house in the woods, a short distance away from a tall tree that you can climb. Is this a coincidence or a reference to Mystery House?


Two trees, alike in dignity?

I climb to the top of the tree, but cannot find anything to do with it so I concentrate my puzzle-solving on the hill with the crack in it. Back in the desert, I tried to sneak into a hole by turning into a snake and slithering in, only to be bitten and die. I try the same approach again and this time it works! I crawl through a dark tunnel for several screens before emerging into a room with a door and all of my stuff. This is obviously the gnome’s lair, but he does not seem to be at home. Not wanting to stick around for too long, I pick up my things and exit out the front door, emerging at the tree that I discovered earlier. Now what?

I delegate the captioning of this image to Kenny.

I check my inventory and notice that I have the cracker that I found in the cactus back. And who might like a cracker? A parrot, of course! I head back to the parrot and exchange the cracker with him for a vial of liquid. I save my game and try it out: I can fly! The effect wears off almost immediately, but I set about seeing if there is anywhere that I can use my new prize. I try it first at the top of the tree, thinking that I can leap out and cross the ocean like Daedalus. Unfortunately, that does not work.

Lambert, the sheepish lion! Or did they not have the ability to use yellow in this game?

A little more experimentation shows the answer: I can use it to fly over the lion guarding the beach. Once there, I find some rope and a rowboat. The sailboat I saw from the last screen is nowhere to be found, but perhaps I will find it later. The rowboat has a giant hole in the bottom, so I try a whole bunch of my items until I find one that works: the blanket. Somehow balling up the blanket and sticking it in the hole makes the boat seaworthy. I am fairly certain that this would not work in real life, but the next time I am in a leaking rowboat with an old blanket, I will give it a shot.

Episode 4: In Which Our Hero Searches For Buried Treasure

“X” marks the spot!

Setting out to sea in my rowboat was not as climactic as I expected. While I had hoped for a bit of The Wind Waker-style island-hopping, I realized soon enough that the ocean continued on forever in every direction except landing on this one specific island, a bit to the east. The first feature I notice on the island is a large “X” on the beach, obviously a pirate treasure. But generally doesn’t “X” mark the spot on a map where treasure is buried? If you were a pirate and actually put an “X” where your treasure was, I think it would get stolen pretty quickly. I would be stealing it already, but I do not have anything to dig with.

Exploring the island is easy, but there is a bit of a interface-stupid here. In a couple places, it seems that if you type a direction and there is nothing that way, you walk off the edge of the island and drown without warning.

Treehouse of brown, now sit down!

I explore a bit further and find a treehouse in the jungle, but no way up. The rope that I found seems to be the right approach, but there’s no heft to it and so I can’t get it high enough. I keep exploring and the answer comes immediately: there is an anchor on the beach in the next screen. I tie the rope to the anchor and throw it up to the treehouse. This lets me climb up and explore, where I find a shovel. I backtrack to the beach and start to dig.

Putting my “Happy Wanderer” muscles to good use, I unearth a treasure chest. Before I can open it, a pirate jumps out from behind a tree and steals it. That makes twice this game that something of mine has been stolen, but at least there are no snakes. Thanks to the poor graphics of this game, you never actually see the pirate except in your imagination. His whole appearance is only described in text.

The last time I met a pirate that hid things in a cave, the cave was a bit bigger than this.

I continue exploring the island, quickly finding a cave containing a treasure chest. This whole section of the game seems a bit under-designed. Maybe I am just lucky, but I keep finding the puzzle objects I need immediately after learning that I need them. There is no challenge here. I suppose I could have stumbled into the cave before I got the treasure, but at least the way I am playing it through it all connects pretty simply.

Inside the chest is a harp. I can play it, but there is no obvious magic. I continue exploring the island, playing the harp in random places, but do not find anything else of interest. I also do not find any way off the island, or even a good clue where I might go. I know from the manual that the direction of the evil wizard’s fortress is north, but that does not help all that much. Not wanting to give up, I cross back to the original landmass and play the harp everywhere there as well. No dice.

I am not ashamed to tell you that this is when I spent a LOT of time trying to chase after that sailboat. Remember the sailboat? The one you can see from the beach and the top of the tree? The one that is definitely not a rowboat with a leaky bottom? My thinking was that something from the north island would let me snag the boat so that I could continue sailing north.

Curse you, sailboat!

In all of this exploring, I decided that maybe I could use the vial to get to the sailboat. I restored to before I sailed over the lion and looked for a different approach. I did not have to go too far through my inventory before I discovered that this lion enjoys bread. I gave him some bread and he let me pass, but this time I still had the vial. I used it on the beach, but I was still unable to find a command that would let me get to the sailboat.

Running out of ideas, I started trying the vial in various places on the jungle island. I found the trick pretty quickly and I am fairly ashamed that it took me a while to work it out: I went to the northernmost screen I had found so far, the beach with the anchor, and used the vial there. I then typed “north” and I flew over the water to another beach!

Is this the right solution? I do not know. The vial was used once already to solve a puzzle that I could have solved another way. Was this the right solution? Or a cheat that will trap me later? I am not sure, but I am sure that my time is up for this week.

Thus far I am enjoying the game, but it is far from perfect. This week’s session was not as annoyingly difficult as the desert maze was, but there were spots when it just came too easy. Finding the object you need in the screen after you realize you need it is fun once, but it happened several times on this leg of the journey. Let’s hope next week is better!

Next time: the thrilling conclusion!

Session time: 4 hrs
Total time: 5 hrs